

![]()

Diary listings have the most recent entries at the top. You can start reading the first entry here. Originally posted in my LiveJournal blog.
VFL vest, revisted (with photos)
|
|||||||||
| Victorian Fashion Ladies Vest | ||
 |
 |
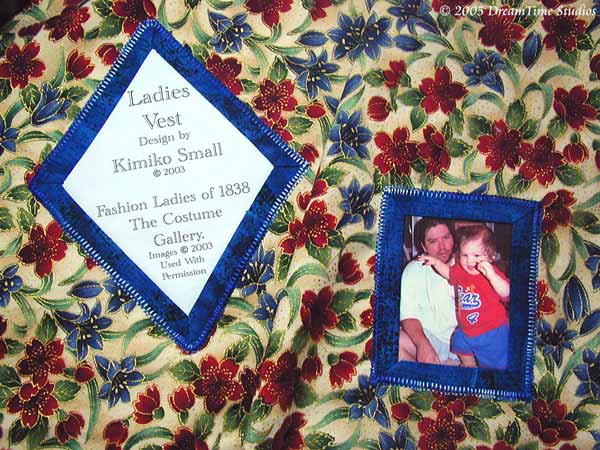 |
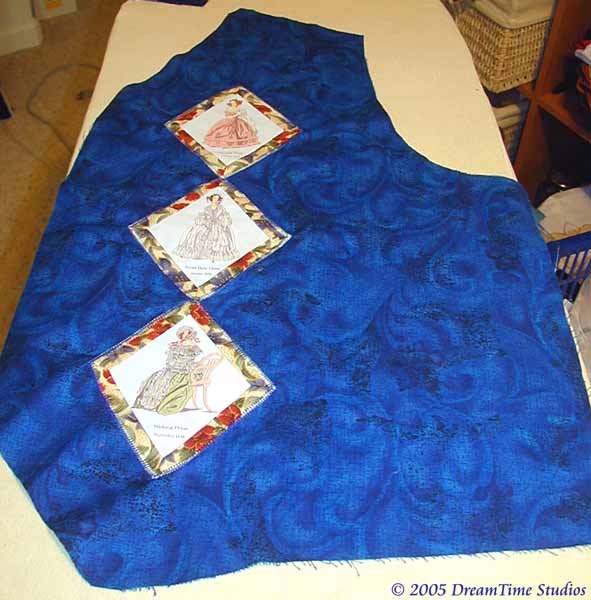
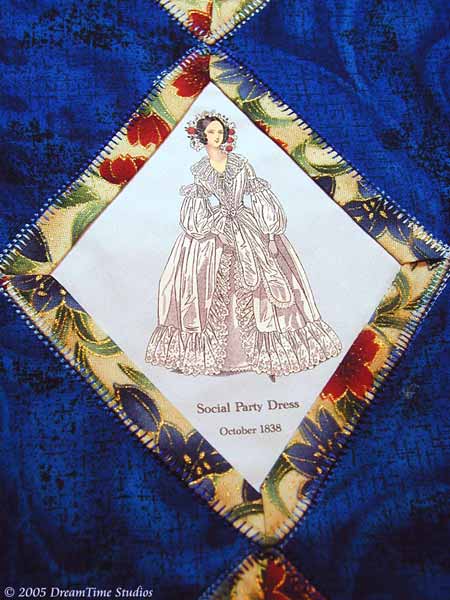
| Overall view of left front vest piece, showing the three smaller ladies in the border print. | Detail view of middle Fashion Lady. The caption reads "Social Party Dress, October 1838". | View of lining material, showing the title piece, and my husband and younger son. I will be adding an ending date by hand later. |
Well, off to bed! I only hope I can actually sleep, as my mind lately has been turning this project over and over, trying to figure things out. I know that's a good thing, but my body hates me for it in the morning when I have to get up with Cam.
{Previous}
Fashion Ladies vest, part I
February 7th, 2005
I finally got back into sewing, after the whole last month just cleaning out parts of my home, and painting the living rooms. I've had this simple vest that I wanted to embellish with images of the 1838 Victorian Ladies I did for CostumeGallery.com, but it's been on hold for nearly two years. So, in flybaby thoughts, it was either work on the piece, or chuck it out, and I didn't want to toss it yet. So Friday and today I spent a little bit of time fiddling with the framing bindings, attaching the Ladies onto the vest pieces, and sewing them down using a decorative stitch. It felt nice setting the machine up and actually working again.
The vest outside fabric is a dark blue in a swirling and mottled cotton quilt fabric. The inside lining fabric is in red and dark blue flowers, with an ivory background and gold accents, and is also a cotton quilt fabric. I purchased both fabrics at Quilter's Paradise in Clovis, CA. The Victorian Fashion Ladies are computer images printed onto a white washable computer fabric (some of those fabrics are not washable). I received permission from Penny Ladnier to use those images that I helped to clean up for her site, www.costumegallery.com, when I worked for her as an intern.
I am using the lining fabric to border the Victorian Fashion Ladies, which are cut in diamond shapes and then bound. I am using Steam-A-Seam lite to attach the pieces before sewing them down with a decorative machine stitch using a duo tone rayon thread. I will be adding pretty buttons to accent, as well as close the front, but I need to find those first. The inside will also have a picture of my husband and younger son, near my heart. I think I will change that to a more recent photo of the two, as well as an image of my older son. Those images will be framed in the blue swirly fabric. I will add in a "title" of the garment as well, also bordered in blue.
The vest was something that I had stopped working on because my need to be perfect was rearing its head again. The binding for the images just wasn't working out right, so I stopped working alltogether. Well, after January's FFG class on seam binding and pipings, I had no more excuses. However, the need to be perfect almost made me chuck the original work and restart from the beginnings with a new printout, new binding fabrics, etc. But I stopped that train of thought when I realized that I didn't have any more fabric to do that with, and would be lucky to find that same bolt of fabric at Q.P. two years later, just to get a half yard for the bindings. So while the old bindings aren't perfect, the bindings that will join the outside to the lining will be done using my newfound knowledge. So, this vest will be a showpiece of what to do and what not to do.
I did take photos tonight, but I am not inclined tonight to work on them in Photoshop, so I will have to wait on posting those images later, like when the vest is done I hope. I will be working on the vest between and after the drapes for the living room are worked on, as the plans for that simple vest have increased to making it a quilted vest. Seems the images are rather heavy, and the cotton fabric is light. It just isn't hanging properly, so I think interlining with cotton flannel will give the rest of the garment substance, and the "quilting" will add more pizzazz with the dark metallic thread I plan to work it in. I am also thinking that I can add beads as well into the mix. I don't have any clear plans on this anymore, so I am hoping that whatever stray ideas come my way will work out in the end. This really is a lesson in trusting my instincts... something I need to do more of if I am going to do more art-to-wear modern garments.
{Next}
Home
Creative Blog
Kimiko Small Designs
Joan Silvertoppe's SCA Resumé
Warderobe Accounts
Brodyworke Accounts
Scriptor Arts Folium
Tudor Research
Workshops & Articles
Inspiration Gallery
Largesse
Favorite Links
About Me
Contact Me
http://www.kimiko1.com
Entire website, graphics, and text (unless otherwise stated)
© 2003-2013 Kimiko Small, All Rights Reserved