

![]()

Diary listings have the most recent entries at the top. You can start reading the first entry here. Originally posted in my LiveJournal blog.
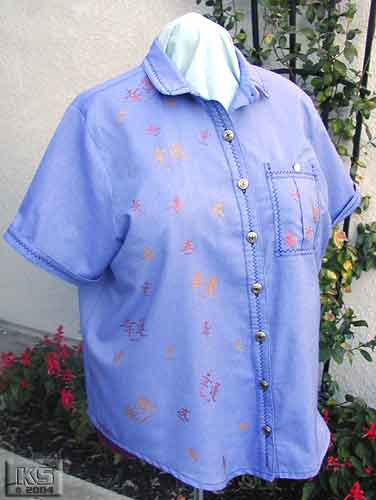
My simple stamped shirt
|
 |
 |
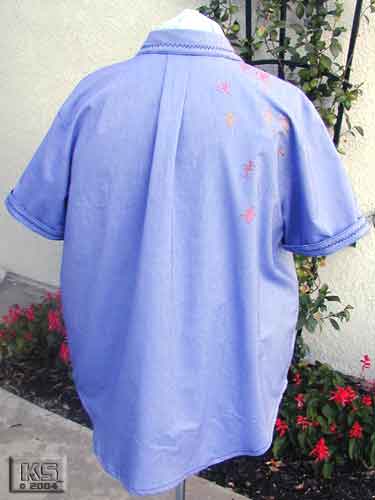 |
| Side front view of complete shirt | Full front view | Full back view |
 |
 |
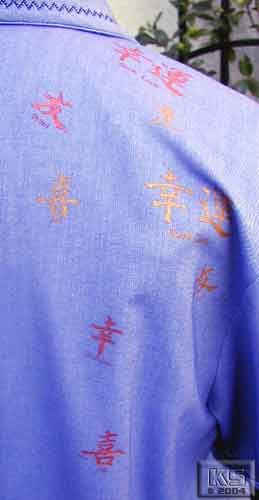 |
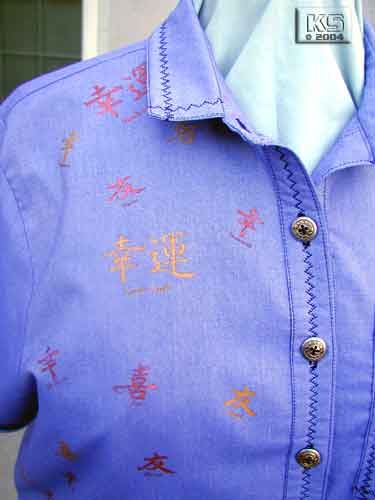
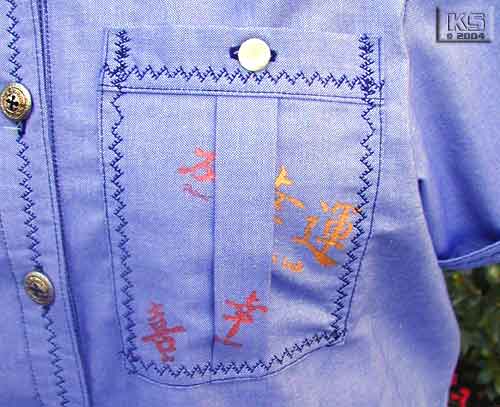
| Detail of upper right front of shirt | Detail view of left side pocket | Detail view of back right side of shirt |
I look forward to showing it off at the next FFAG meeting.
{Previous|Finis!}
Stamping a Shirt
July 22, 2004
On the topic of my simple art-to-wear project... I have been slowly working on a new shirt for myself, which I mentioned before. I decided to stamp the right front, part of the right back shoulder area, and the two pockets. I am not sure if I am going to use both pockets, but I thought they should both be stamped, jic.
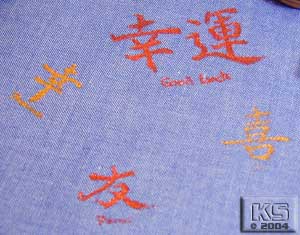
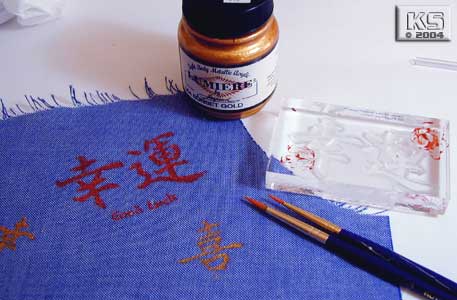
I stamped the shirt front in gold and copper metallics. I used Lumiere paints, and I really like how they look. I used oriental character stamps, both from Purrfection (the clear stamps) and from Michael's crafts. The stamps I used are "Joy", "Friend", "Fortunate", and my personal fav, "Good Luck". I tried out all my colors on a test strip of scrap fabric, and the gold and copper seemed to do the best for what I wanted.
The stamping I liked ok, but the metallics didn't seem to be metalic enough with just the stamping. I also had some paint pool around the stamped image area, which pooled onto the fabrics (bah!). After letting the stamped images dry I went back over and hand painted the characters.
It took me over two and a half hours to do all that, and not in one sitting since Cam decided to have shorter nap hours in the past few days. But now they are done, I have some photos here to show how the stamping looks.
 |
 |
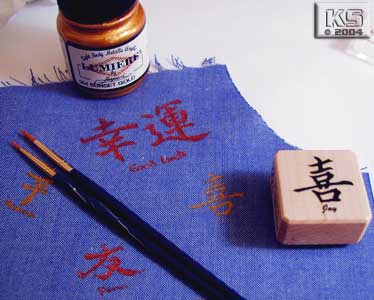 |
| Detail view of stamped images, in copper and gold paint. | View of stamped images, with paint, brush & clear acrylic stamp. | View of stamped images, with paint, brush & wooden stamp. |
I hope to have time to finish sewing the garment together before I head off to Costume College, but I had to let these dry 24 hours and then iron them to heat set, before I can actually sew them together. I could probably sew them anyway, but the ironing would just be easier without the seams in the way.
Meanwhile, I am pondering what kind of personal dress style I want to design for myself. Gotta be comfy, fitted properly (well, duh), and something that says "me"... but what.... That has been the stumper. Who am I now and how do I want to reflect who I am to other people?
A simple sewing project.
July 18, 2004
Well, my day has been interesting so far. Besides watering my Mom's yards, feeding the cats there, and the stacks of dishes here, I have been working on a new shirt pattern, Paw Prints/Purrfection #1024 Safari shirt.
I did the same pattern pants already, but they didn't fit right because those were my first pants patterns, and I had no clue what to do to make them fit right. I thought of making them over again, but I wanted something else to do.
I thought of banging my head on another complicated costume part (that I have a list to do by October), but decided to just do something different and make a simple shirt for myself to wear everyday. Several of my ready to wear shirts are in a similar style, so I thought I would make this one and jazz it up a bit with some creative stamping. I had bought the stamps and fabric paints a few weeks (months?) ago from purrfection, and they had been sitting. I figured why not have fun and hopefully have something nice to wear at Costume College, that isn't a costume.
The material is a nice soft medium blue cotton chambray, or that was what the bolt stated. It is softer than most cottons I have felt, so I am wondering if it may be blended with rayon or something. Gotta do a burn test sometime to be sure. It is 61.75" wide after washing, so I have enough material left over to make another shirt if I wanted.
I spent today tracing out the right sizes for me to wear onto butcher paper. I traced the XL upper chest and went out to a 2X for my wider hips. Now the pattern has enough ease that I could have stuck to the XL, but I hate how my rtw shirts just skim my hips, and since I am sewing this, I may as well make it fit ME, not some mythical "standard". Heck, if I can make a bodice fit to a T, I can make a simple boxy shirt fit better.
I then went on to cut the fabric out. I gotta say I love the weights instead of pins approach to cutting out fabric. Much faster and easier, especially using a rotary cutter instead of regular shears. I then pinned the sides and shoulders together and did a quick pin fit to see how it hangs. I like so far. I am pondering making a small dart for my low breasts, but since it is a boxy pattern, it may just stay undarted. 'Sides, I don't want to go into adjusting the sleeves to fit the smaller armhole.
I do plan on stamping the right side front, the two pockets and partially down the right back shoulder area with my oriental stamps. I am not sure what colors to use, but am pondering gold on the medium blue fabric. I am also pondering using my smaller stamps to go down the front right placket, just a little ways. I am not sure, so I may do that after it is all made up, using painters tape to block off the non-stamped areas.
Well, I gotta go for now. I have my front yard to deadhead flowers, and finish up the dishes. I hope I have time tonight after Cam's to bed to stamp the fabric. Oooooh, I can't wait!!!
{Next}
Home
Creative Blog
Kimiko Small Designs
Joan Silvertoppe's SCA Resumé
Warderobe Accounts
Brodyworke Accounts
Scriptor Arts Folium
Tudor Research
Workshops & Articles
Inspiration Gallery
Largesse
Favorite Links
About Me
Contact Me
http://www.kimiko1.com
Entire website, graphics, and text (unless otherwise stated)
© 2003-2013 Kimiko Small, All Rights Reserved